
Brightly bedazzled chocolate witch hats and ghost cookies your kiddos will love to make. The easiest last-minute no-bake Halloween treat ever!
- 1 dozen fudge-striped cookies like Keebler
- 12 each chocolate kiss candies
- edible writing gel such as CakeMate
- miniature M&M's
- assorted sprinkles
- 1 dozen peanut butter sandwich cookies like Nabisco Nutter Butter
- ½ cup white chocolate chips
- ½ tbsp shortening
- miniature chocolate chips (for eyes)
-
Arrange the cookies (fudge stripes facing down) on a large cutting board or baking pan. Unwrap 12 chocolate kisses and toss the wrappers.
-
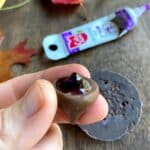
Take a chocolate kiss, and squeeze a dollop of writing gel onto the bottom of it. Place the kiss right-side up on the center of a cookie, pressing down slightly so there is a ring of gel showing at the base of the chocolate kiss. Repeat this for the remaining cookies.
-
Decorate with assorted sprinkles and miniature candy pieces, making sure to cover all the exposed gel. Set aside and continue until all 12 cookies are decorated. Step back and admire your genius and creativity!

-
Store for up to a week in an airtight container. Be careful not to stack the cookies on top of each other or to overstuff the container.

-
Put the white chocolate chips and shortening in a microwave-safe bowl. Microwave for 15 seconds at 70% power. Stir. If not fully melted, do a second interval of 15 seconds at 70% power, then stir again. Continue these intervals until fully melted and creamy, being careful not to over-heat the mixture.
*Note: microwave strengths vary widely. In my kitchen, it barely took two intervals for the mixture to be fully melted and ready to spread on the cookies. Adjust timing based on your microwave.
-
Working steadily while the chocolate is warm, use a knife or small spatula to spread the melted chocolate over the top of a cookie. Place two miniature chocolate chips for eyes, then set aside. Continue with each cookie until all 12 are done.

-
Once the chocolate has hardened, you may enjoy them immediately or store in an airtight container for up to one week.